Edit: Since this post has gone up, I’ve built a brand new site all about Gundam model building! Like Gunpla? Click the image below to visit my new blog, Gunpla 101.
I recently hit a milestone in Gundam building—my tenth ever Gundam. Finally, after eight High Grade models and two SD models, I’m ready to tackle my first Master Grade—an Endless Waltz Deathscythe Hell that we got as a wedding present (yes, we’re geeks and so are our friends).
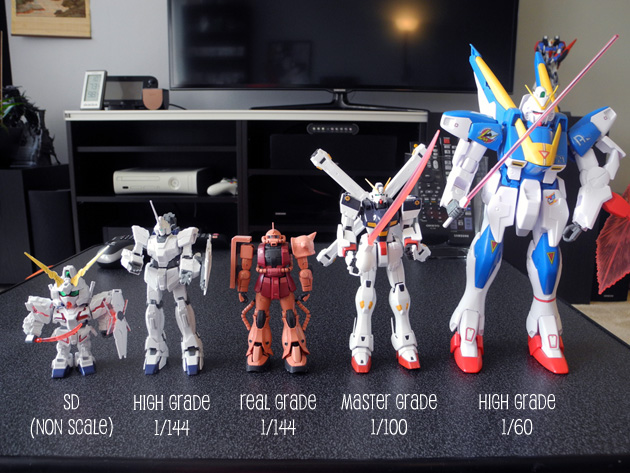
Ever since I wrote Gundam Modeling 101, I’ve gotten lots of questions about the relative difficulty of Gundam modeling, especially in regard to the grades. It can be a little confusing, so I made a chart with some of my Gundams to clear it up:
As you learned in 101, Gundams vary in both size and complexity, or as manufacturers refer to it, grade and scale. The difficulty of a Gundam lies entirely in its grade. The scale has nothing to do with it. Which of the Gundams pictured was the hardest to build? It was NOT Victory Gundam (High Grade 1/60). It’s easy to make this misconception because the hardest Gundam models on the market—Perfect Grades—are almost always 1/60 scale.
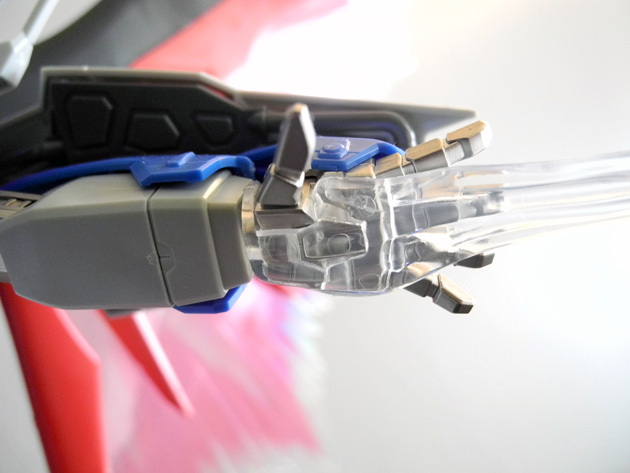
Actually, the real toughie of the bunch is Crossbone Gundam (Master Grade 1/100). As a Master Grade, it has the most parts, and these parts have been manufactured with the finest quality. For example? A Master Grade is likely to have working fingers that can grasp weapons just like a real hand.
John bought a new Master Grade, Gundam Destiny Extreme Burst Mode, at Otakon and ever since he put it together, it’s been the centerpiece of our living room. From his iridescent wings to his metallic skeleton to his glittering weapons, Gundam Destiny inspired me to get cracking on my first Master Grade.
Differences of a Master Grade
- Higher quality. Ever started building a High Grade only to find a factory error? I feel you; my Gundam Unicorn is definitely super-glued in some parts. And it isn’t about size. If you look at the “wings” on Victory Gundam in the first picture, you might be able to spot a sharp edge where there ought to be a round one. Little imperfections are far more noticeable on a High Grade, and far less common on a Master Grade, because of the increased level of attention to detail.
- Significantly more complex. They call it a Master Grade because it’s not for beginners. If you think your latest High Grade has a lot of parts, you’ll be amazed by a Master Grade. For example, Gundam Destiny came with 16 different plastic sprues, compared to the 6 sprues it took to put my High Grade Bearguy together. And that’s not even saying how much longer the instruction booklet is! On a related note, expect to devote a lot more time to putting a Master Grade together.
- Bigger investment. A High Grade will set you back anywhere from $20 to $60, depending on if it’s common or a special edition. A Master Grade, on the other hand, can easily cost anywhere from $50 to $100+. It’s a lot to put into a hobby, even if you’re serious about Gundams. That’s why you’re far more likely to find High Grades of every model, and Master Grade versions only of select and popular models.
Are you ready to build a Master Grade?
Here’s a quiz:
☑ I’ve built at least one Gundam model before.
☑ I built my last High Grade model quickly and easily.
☑ I’m looking for a bigger challenge.
If you feel confident checking all three boxes, then I feel confident recommending that you build your first Master Grade. Otherwise, why not try another High Grade or SD until you get more comfortable? There’s no shame in it; I built 10 before I felt ready for something harder.
Tips for Master Grade building
- Choose your model carefully. Sometimes there are multiple Master Grade variations of the same Gundam. I can’t even tell you how many MG variations of Gundam Unicorn there are now. Like with any Gundam purchase, do your research and make sure you’re getting the one you actually want, down to the model number.
- Invest in the right tools. Gundam kits are put together in a way that you CAN construct them using just your hands. But if you’re going to spend upwards of $50 on a Master Grade, you want it to look good. See the notches on Zeta 2.0’s gun in the photo above? Those could have been minimized with a toolkit that included sidecutters and a fine razor. Here’s the toolkit I now use and recommend.
- Don’t work ahead. When I work on a High Grade, I often cut out a bunch of parts in advance in order to speed up the process. But with a Master Grade, there are so many more parts that it’s easy to lose track of what goes where. Only cut out the parts you need for one step at a time, and only move on after the step is assembled.
- Take your time. Even if you’re an ace at building High Grades, don’t plan to build your first Master Grade in just one night. Pace yourself and save yourself the trouble of having to retrace your steps after the fact. Since the final touches are often the most visible, slowing down at the finish will result in a cleaner look.
I hope this helps you feel a little more confident about building your first Master Grade. Be sure to check back as I update with photos of mine in progress!
Like Gunpla? Click the image below to visit my new blog, Gunpla 101.


